Deploying applications in a Windows environment can be tricky without Microsoft’s Endpoint Manager (formerly System Center Configuration Manager or SCCM) or any other deployment tool out there. I’ve found using PSAppDeployToolkit a perfect supplement to these. I’ve used it extensively for many years. It has enabled multiple deployments of applications along with custom setups / initializations for other purposes than a typical application deployment.
Obtain the toolkit
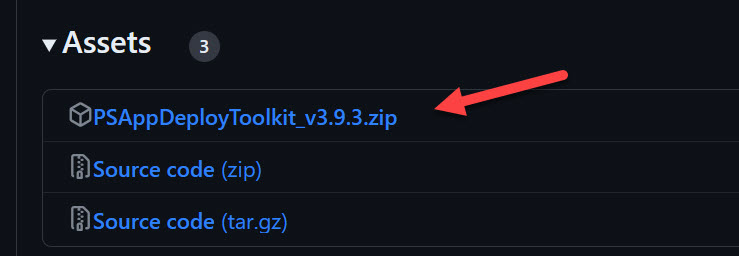
Obtain the toolkit from the GitHub release at PSAppDeployToolkit Release. Select the ZIP file as displayed. The version number may be different.

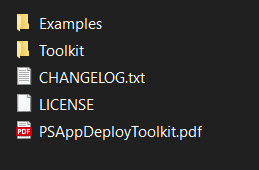
Once you have download the ZIP file, extract all of the components of the file into a directory.

The PSAppDeployToolkit.pdf is excellent documentation regarding the toolkit, how to use, PowerShell variables exclusive to the toolkit along with all of the Functions available. I won’t go into the details here on how to implement the toolkit, just follow this guide and you should be good to go.
I will, however, go into using the toolkit in deployment of custom applications or modifying registries instead of using Group Policy to do it. You may or may not be aware but using Group Policy Management Console (GPMC) to install software can be problematic and it, frankly, wasn’t designed very well to handle the release of software. There are actually many excellent tools out there to release software, PDQ, Chocolatey to name a few but I wanted a remote way to install software on a user’s computer through the use of Group Policy Objects (GPOs). I found the PSAppDeployToolkit the better option for me in this use case.
Customizing PSAppDeployToolkit
There are many customizations you can perform on the toolkit to reflect your company through branding, follow that section in the documentation provided. However, I want to make a note of a couple of things.
XML Configuration File
There is only one XML file in the toolkit under the path Toolkit / AppDeployToolkit named AppDeployToolkitConfig.xml. This file contains xml elements that you need to modify so that logs will look better, whether the particular instance of the toolkit will be require Administrative Rights to run or where the path is to store the toolkit log file.
The following are a list of XML elements that I change in the Golden copy of the toolkit which includes the branding I have done. Again, refer to the provided documentation to brand the toolkit.
- Toolkit_LogStyle – XML element in file represents the type of logfile to be created for this instance. The default value is CMTrace which sets the log file content to display when using the program CMTrace which is actually an excellent program to view logs and shows data in real-time as it is added to the log. In my use case, I use the toolkit to install software through a GPO so I don’t use this format I use the Legacy format so I change the value to Legacy.
- Toolkit_RequireAdmin – XML element in file represents whether Administrative rights are required to run the toolkit in this instance. I set this dependent upon the context the software is installed. If it’s based upon a user’s context then this should be set to False, however, if I use the Startup or Login sections of a GPO then I use the SYSTEM or %username% context respectively for the toolkit. If I use an Immediate Scheduled Task in a GPO to install I generally use the SYSTEM user to perform the installation so in this case I would leave this value in the XML file as True.
These are the only values I change in the XML Configuration file of the Golden copy of the toolkit. I then copy the Toolkit directory contents into a directory named for the application I’m releasing for installation.
Application Installations
The documentation provided by the toolkit is a valuable resource to go through and install an MSI application. You can also use the toolkit to install EXE applications.
Here a few examples of how I’ve used this toolkit:
- Custom Application Data Backup – includes Outlook Signatures, Start Menu and Taskbar Pins, any Automatic Destinations including Quick Links and Recent Files; Browser Favorites (Chrome, Edge, and Firefox).
- Office 365 Installation
- Outlook Signature Templates – generate Outlook signatures from data obtained from Active Directory.
- TeamViewer Installation
- Custom Service Reporting Tool – generates data upon each computer it is installed and saves it in XML format for reading by a Dashboard PowerShell application.
This is all for now on this subject, if you have any questions please do not hesitate to contact me.
